Monday, June 7, 2010

Chocolate Butter Cupcakes

This week the Heavenly Cake Bakers baking project was Chocolate Cupcakes. I love individual sized portions and I love cupcakes so I was happy to partake. Rose describes these as velvetly, moist and deeply chocolatly. The only thing she left out was: quick and easy. With the heat and humidity this past week the quick and easy part was whole-heartedly appreciated.
I usually mise en place the dry ingredients a day or two before I plan on baking, then seal it in an airtight container or zip lock bag. The butter and eggs come out the morning of, to achieve room temperature. Then the wet ingredients are combined just before I start.
The chocolate butter cupcake batter is made with cocoa combined with boiling water. I was very happy to use cocoa again since I find it not as chocolately as the chunks of semisweet or bittersweet chocolate are . Not to mention I am totally out of quality chocolate and shy away from purchasing a fresh supply during the summer months.
Ok, back to the matter or batter at hand. The liquid ingredients; eggs, water and vanilla ar combined and set aside. The dry ingredients which were cake flour, superfine sugar, baking powder, baking soda, and salt are mixed in the bowl of the mixer. The butter and the chocolate mixture is added and mixed on low speed until the dry ingredients are moistened. After scrapping down the sides the wet ingredients are added in two parts, mixing only until blended (about 30 seconds).
At this point I decided to make small or mini cupcakes. It is easier on the waistline and much easier to share. To finish these little cakes off I used a butter cream frosting and gave it a little green tint to match the liners. Cute, huh?!
These little cakes were just delicious, the fine choclate crumb were tasty and moist, as promised. The buttercream melts in your mouth making every bite of these little cakes simply "heavenly"!
What is your favorite topping?

Tuesday, June 1, 2010

The Miracle of Life

Look closely and you will see one of the miracles of the animal world. Early summer is the usual time of year when the doe population in our area give birth. Although it is common to see the deer traveling through the yards, occassionaly we are lucky and get to see one of the many fawns born each year. The doe isn't usually too far from her young but, she does need to eat. So during the first few weeks of life she will instinctivly leave the fawn or fawns in a "safe" place while she feeds, then go back to that "safe place" to retrieve her young. This little fawn was happened upon by accident and I took advantage of the opportunity to snap a few pictures. She kept her eyes closed and stayed very still so she wouldn't be noticed! But, don't worry she was fine and not an hour later she was reunited with her mom and off they went. Once the babies are a few weeks old they will follow their mother wherever she goes and eventually feed beside her. This is special and is a beautiful thing to watch. I wouldn't trade it for anything.

Monday, May 31, 2010

Swedish Pear & Almond Cream Cake

This week the Heavenly Cake Bakers assignment was "free choice"! Yes! This worked out very well since we were traveling and the weather was hot and sticky. I knew I wanted something simple, tasty and different. The Swedish Pear and Almond Cream Cake fit the bill perfectly. Pears; light, sweet, delicate. Almond paste; whats not to love there and a sour cream base cake; yum.
So misen place the three components- the Almond Cream filling, the cake batter and the pears.
First the Almond cream which can be made in advance and kept in the refrigerator. Putting it together was a snap in a food processor by just combining the almond paste, butter, sugar, egg, vanilla, and a little flour.
In this recipe cake flour or all-purpose flour can be used. I chose cake flour. There is also sour cream along with the usual eggs, sugar, vanilla with baking powder and baking soda for leavening. I love a cake with sour cream, I find it to be richer and smoother especially when paired with cake flour.
The pears are simply thin sliced and drizzled with lemon.
For the assembly begin with a well coated and floured bundt pan. The cake batter is spread evenly all around and smoothed with a small metal spatula. Using the spatula again make a shallow depression in a circle around the pan. Spoon the almond cream into the depression. This helps to keep the cream from touching the sides of the pan. Next and last layer is the pears; in two overlapping rows around the top. Simple... right?! Exactly what I needed for this holiday weekend too.
Although the Swedish Pear and Almond Cream Cake is simple to make it is not an ordinary cake. The taste is incredible, the cumb is fine, and the almond flavor is just enough not to over power the sweet delicate taste of the pears.
I had no problem with this cake, it traveled well and everyone enjoyed it. Boy, am I glad I got the final picture when I did because it was gone in two days!
Traveling with baked goods is always a challenge. I find that I either make something that can take the heat or travel with a cooler filled with the components. What are you favorite traveling sweets?

Wednesday, May 26, 2010

Strawberry Season

Anyone familiar with the east end of Long Island knows what a thrill it is when spring starts to turn into summer. The strawberry fields are abundant with large, sweet, red berries. The signs are all over; "pick your own strawberries here"! Every year we picked baskets full; one for me- one for the basket, two for me- one for the basket until our fingers were red and our bellies were full. Now we live in a more rural mountainous area where strawberry fields are few. But, as soon as I see the season's first berries in the supermarket the memories flood back in.
Strawberries are at their peak here and I can't seem to get enough of them. I've made strawberry preserves, strawberry puree, strawberry ice cream and strawberry tarts so far. You'd think we're going to be able to eat these red orbs all summer, huh? Well, not the case since we have been eating and sharing everything, saving only a few small tid bits in the freezer.
I found a simple low (well, maybe just a little lower) cal Strawberry Meringue Tart in Nick Malgieri's, "Perfect Light Desserts" and just had to try it. "J" usually doesn't like meringue but agreed to give it a try. First up I needed to make a not-too-sweet strawberry puree (not called for in the recipe but, I thought it would enhance the strawberry-ness of the tart). This is super simple; using strawberries, sugar, lemon juice and a little lemon zest. Just reduce down to a jam like consistancy and cool. Now that was easy and you can do this with just about any fruit.
The next component is the Pate Sucree tart shell. Instead of making one large tart I chose to make six small ones. This makes it easier to share therefore, I eat less therefore, less caloric intake if you catch my drift. The dough is then divided among the 3 1/2" tartlet pans, docked, blind baked, and cooled.
The recipe then calls for the meringue to be made. This was probably the easiest and yummiest meringue I ever made (I licked the whisk and bowl since no one was there to stop me!). The directions are to put the eggs, sugar, and pinch of salt over simmering water just until the sugar melts and the mixture is hot (continiously whisking). Using the mixer and whisk attachment; the egg mixture is whisked until risen in volume and almost completely cooled.
Now the fun part. Take the cooled shells spread a layer of puree on the bottom. Arrange sliced or halved cleaned strawberries over the puree, then pile on the meringue (freeform peaks, piped like a beehive or smooth tops). Placed them in a 400 degree oven for about 5 minutes (keep close watch) to give the meringue a golden color. Or if you have a handy dandy torch that works well too.
The result: "J" and the neighbors we very happy with the tart as was I. It is very refreshing and the beloved strawberries are front and center! Maybe next I'll try Strawberry Scones......
What do you do with strawberries?
.

Monday, May 24, 2010

Bernachon Palet D'Or Gateau

Heavenly Cake Bakers, a group of incredible bakers using Rose's Heavenly Cakes by Rose Levy Beranbaum for weekly inspiration. Yes, I joined just waiting for official confirmation that I'm in. But, that won't stop me from this week's challenge- nope. My only hope is that I can create cakes half as good as those I have seen so far.
This week's challenge is a mouthful in many ways. The Bernachon Palet D'Or Gateau is a wonderfully beautiful, (cover photo for the cookbook) cake. I was ready for a challenge and this did not disappoint.
The first step is to put together and bake the chocolate cake base. The sour cream addition to the cake batter gave it a smooth texture and fine crumb.The cake uses only cocoa powder here for its rich chocolate taste.The ganache layer however is something else indeed.
For this layer Rose's recipe calls for a chocolate ganache with the addition of sour cream for a little tang. I however decided, since I was craving peanut butter for two days that I better make a ganache with some tasty, creamy peanut butter. I used the chocolate peanut butter ganache recipe on page 186 to satisfy my craving. Since the chocolate takes center stage in either version of ganache it is important to use a good chocolate. I have in my arsenal a semi-sweet Callebaut for just such an occassion.
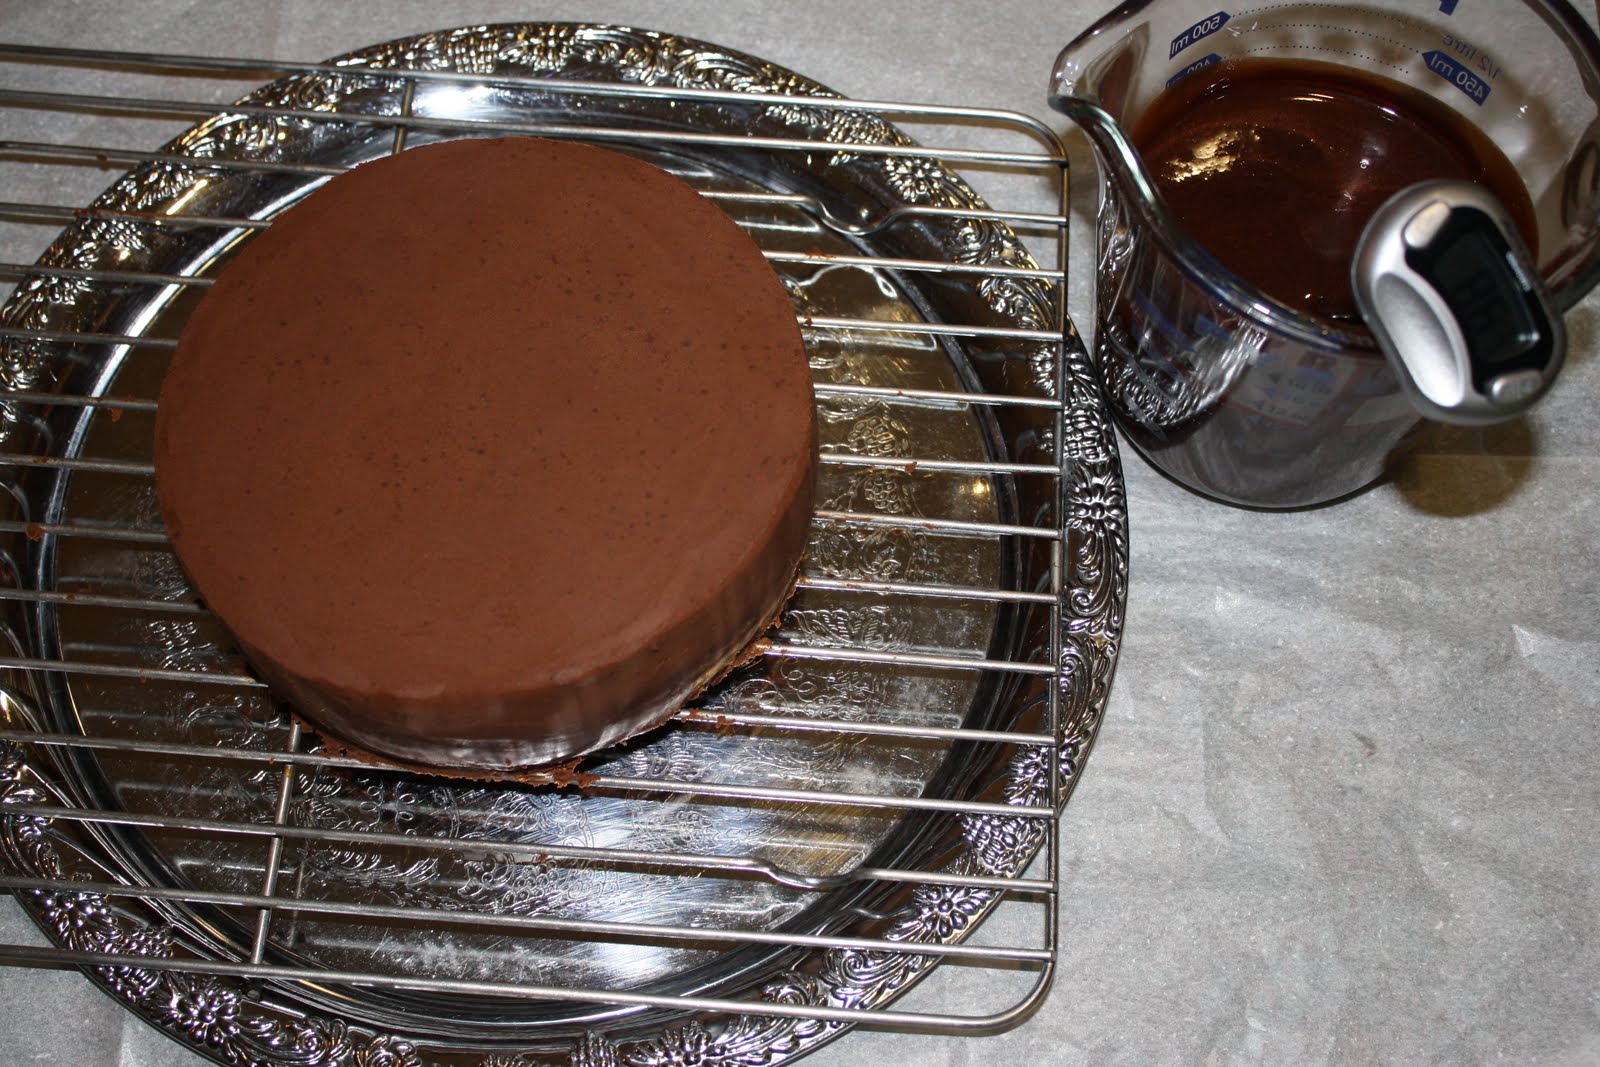
The final step is a thin illustrious Chocolate Laquer Glaze. Again this uses cocoa powder, not that that is a bad thing just different than the galzes I've used in the past. But the result is an incredible shine and beautiful presentation.
The only problem I ran into is that the glaze remained quite wet even after 12hrs. The only reason I can think of is that is is very humid here and may have contributed to the wetness. My testers all agree that this cake is very good and encourage me to keep on baking!!! I am very happy with Rose's book and the resulting cakes that I have made thus far.

Wednesday, May 19, 2010

Gateau Breton & Heavenly Cakes

I have been following the escapades of the Heavenly Bakers and was inspired by some of the delicious looking cakes they baked. So I decided (with very little arm twisting) that Rose's Heavenly Cakes was a must have in my collection and a must try. After having received and perused though this lovely book I decided to begin my adventure with the Gateau Breton. Never having made this before it looked easy enough, maybe too easy. Boy, was I suprised at the results.
As described in her book, the Gateau Breton is a cross between a pound cake and shortbread. I love the simple flavors of both, however this version steps up a notch with the addition of ground almonds (nice texture). The recipe calls for vanilla and dark rum for flavoring. Well, I never bother to measure vanilla (that was easy). But, dark rum is not something I keep around. BUT, I do keep over-proof white rum in the cupboard, so in it went. Of course lots of butter and eggs then presto chango!
The resulting cake is firm around the edges and a slightly softer in the middle, and pleasantly moist. The vanilla and rum together with the fine texture of the almonds was simply beautiful. "J" loved it so much that he went in for seconds. "This is a keeper", he exclaimed!
I think for now I will just follow the "bakers" from a distance. With the summer coming up I am not sure I can keep up their pace (I'll have to put more thought to that decision).
My next project will be the Swedish Pear and Almond Cream Cake! Until then....happy baking!

Thursday, May 13, 2010

Chocolate & Coconut Mousse Parfait

Inspiration comes from many sources. One of my favorite places to search is not only the many books and magazines in my collection but, other blogs. If you follow me at all you would know I love anything "mousse". So when I happened upon one of my favorites, Cannelle et Vanille, and she was featuring chocolate & coconut as a mousse on top of a hazelnut cake base. Well, I just couldn't resist. The cake portion or "biscuit" as it is referred to uses hazelnut flour, cocoa powder, egg whites and butter. Along with the usual leavenings this is the quick and easy part. The results is a very moist and very tasty cake base to compliment the next two layers. Next up is a delectable chocolate mousse using the eggs' golden treasure (yolks) & a wonderful Calebaut semi-sweet chocolate. The mousse is lightened with whipped cream and is ready for it's place on the cake. The only thing I would change is at this point I would prefer the mousse to be a little lighter. (A good excuse to make this again, huh!) The third and last layer is a scrumptious coconut mousse. Picture this: you have rich and smooth coconut flavored cream mixed with fresh grated coconut set up with gelatin and then lightened with whipped cream. Oooo yeah.... Now the finale: Simply sprinkle the top with more fresh grated coconut! Well, I thought I died and went to baking heaven when I tasted this beautiful dessert. My husband (not a big chocolate fan) loved it. And my son, well he likes anything homemade! (Taught him well!) If you are interested in obtaining this recipe I suggest you visit Cannelle et Vanille's blog. You won't regret it! Enjoy :)