Showing posts with label Heavenly Cake Bakers. Show all posts

Monday, February 28, 2011

Sticky Toffee Pudding

This week I was able to hop over to the Heavenly Cake Bakers and join in the fun of making Sticky Toffee Pudding. Sticky Toffee Pudding is something I have never made but have it on my radar to try for quite some time. Several (and I mean probably 5 or more) summers ago a popular ice cream maker had a contest to come up with a new flavor. The winner was, yes you guessed it, Sticky Toffee Pudding. Ever since then it has remained on my mind so this was the perfect chance to give it a go.
The dessert is broken down into 3 main components. The first being the spice cake. The batter calls for stout beer, dates (yum, my favorite), butter, sugar, vanilla, eggs, flour, baking powder, salt, cinnamon, and nutmeg. As always I cut the recipe in half and used a small rectangular Pyrex baking dish. I reduced the oven temperature as per Rose's suggestion and it still took a bit more time than she suggested. No problem though.
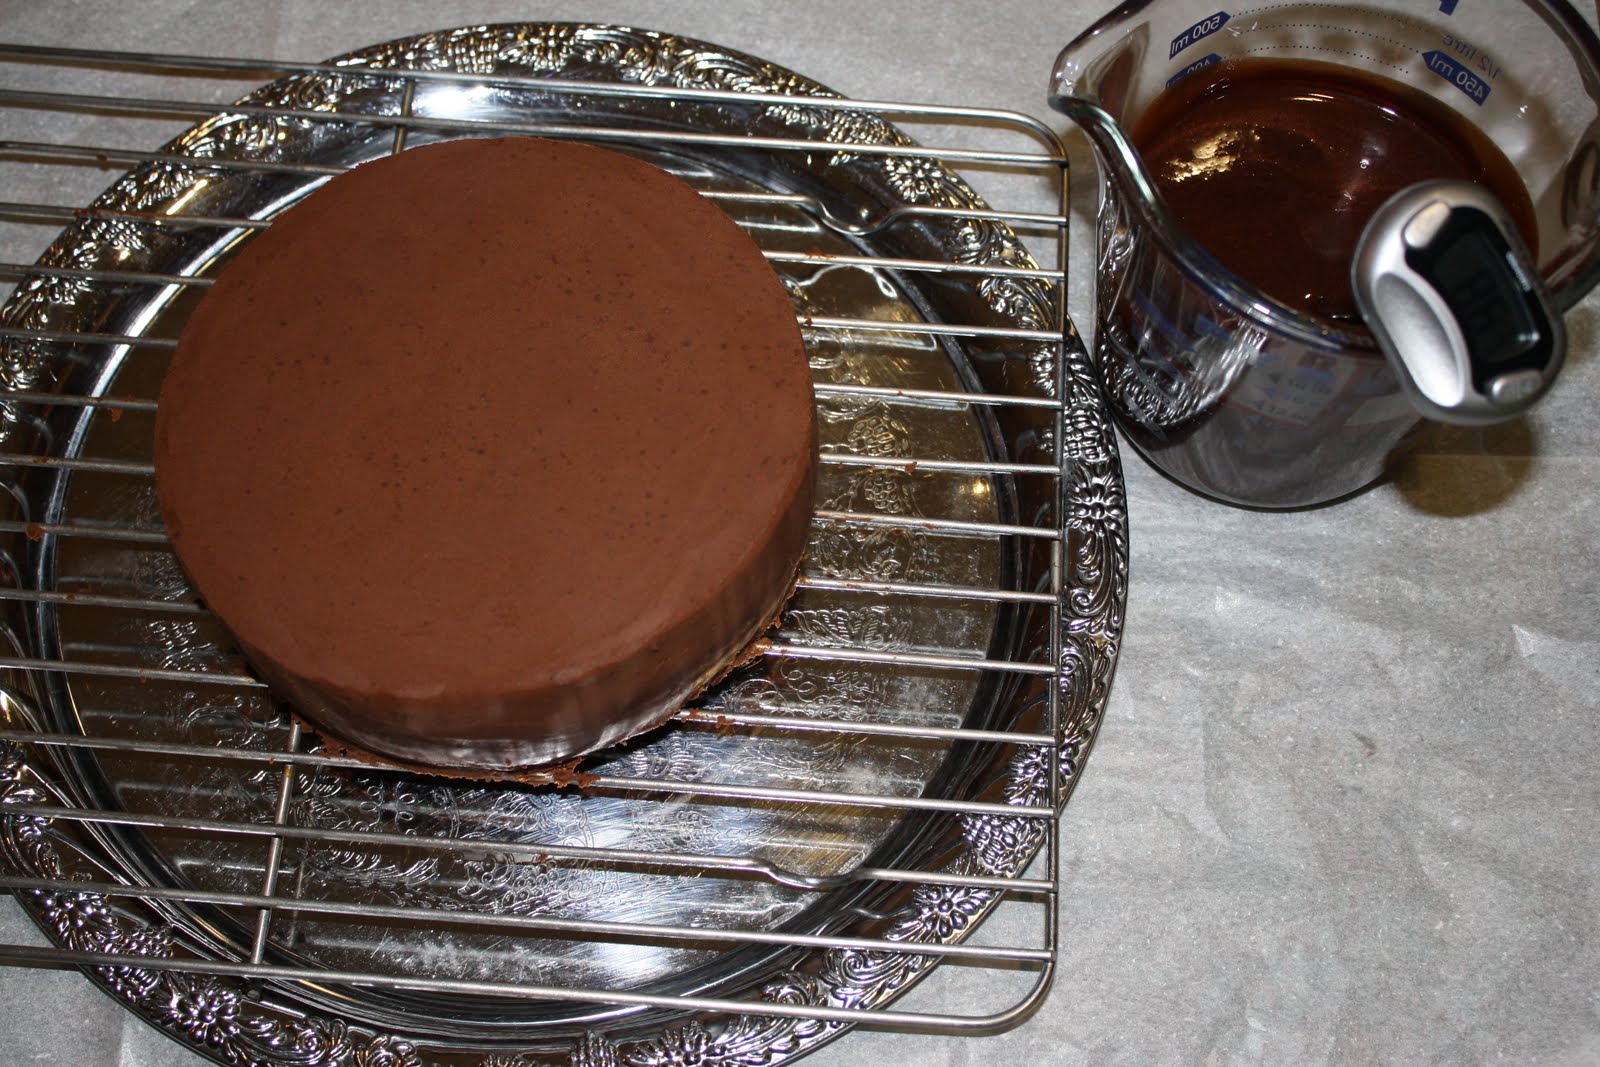
The next component is a Butterscotch Toffee Sauce. Here I switched out and used Cinnamon-Honey Carmel Glaze, a recipe from my blogger friend Hanaa, at Hanaas Kitchen. It promised to be a little lighter and included some honey- I was sold! The rest of the ingredients are cinamon, brown sugar, heavy cream, butter, honey, and a little lemon juice. For these directions I'll have to direct you to Hanaa's Kitchen but, it is well worth the trip.
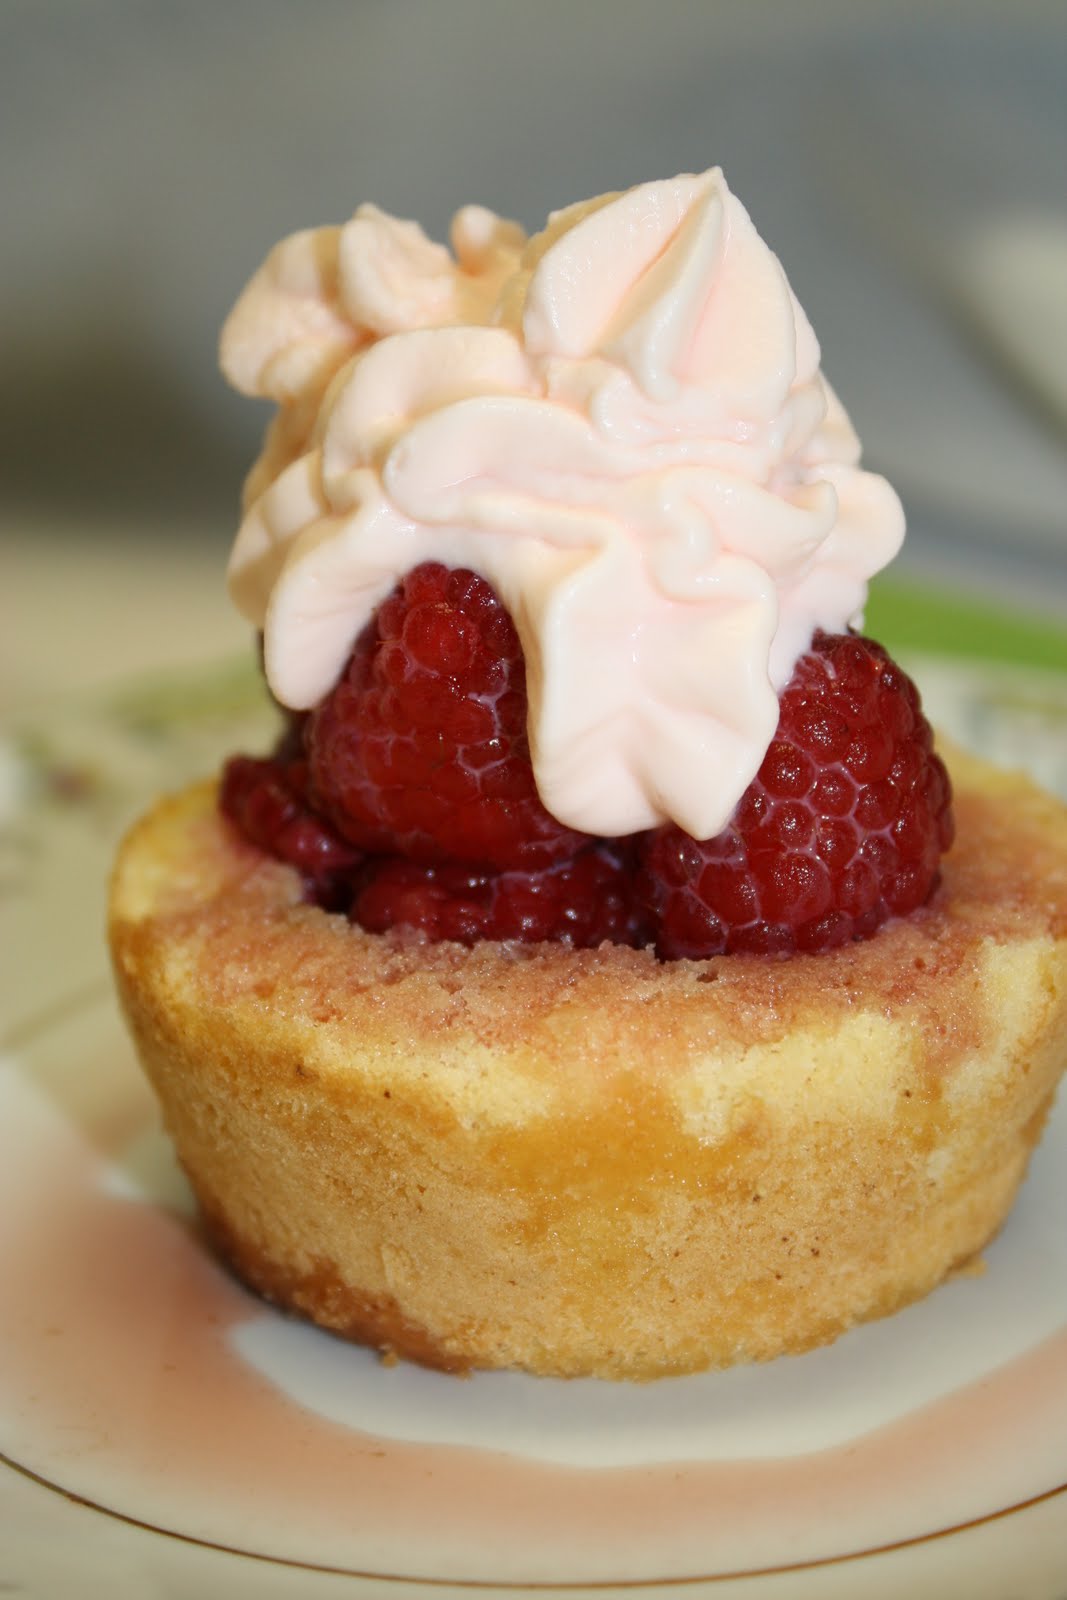
The last component to this lovely dessert is some lightly whipped creme fraiche (I used lightly sweetened heavy cream) and some pecans. To put this all together is a snap. Cut a square of the warm spiced, moist cake drizzled with the lovely, silky smooth Caramel Glaze. Top it off with a dollop of whipped cream and sprinkle with pecans. What is not to like!
All I can say about this is "Oh my this is devine!" Hope you get the opportunity to try some. Let me know what you think!

Monday, January 24, 2011

Genoise Tres Cafe

I had the opportunity to bake with the Heavenly Cake Bakers this week and the project was Genoise Tres Cafe! Coffee isn't my most favorite of flavors but my hubby likes it and I didn't want to fall too far behind besides we were having guests so it was a good opportunity. The last time I attempted a genoise I found it to be a bit dry. Some of my fellow bloggers suggested that perhaps I didn't use enough of the simple syrup to moisten the cake. So I listened this time (see...sometimes I really do listen) and well......let's start from the top!
The genoise for this project called for beurre noisette (remember, that's browned butter..yum!!!) which is really why I didn't hesitate. Also in attendance was vanilla, eggs, superfine sugar and Wondra flour (I substituted cake flour). Rose suggested adding coffee extract or instant expresso which will eventually give you the "Tres" in "Tres Cafe". But, I decided to skip that part thus allowing the beurre noisette to stand out.
The next component was to be coffee syrup. This of course I did with sugar, water and instant expresso powder. I followed Rose's directions this time and soaked the bottom of the cake and the top of the cake with all of the syrup. If you look closely at the next photo you can see the syrup line.
The third component was a Mocha Whipped Ganache with chocolate, instant coffee powder, heavy cream and vanilla. This took me three tries to get and I still don't think it was perfect. Here is the directions: In a food processor, process the chopped chocolate with the coffee powder, until very fine. Scald the cream. With the processor running add the cream through the feed tube. Process until smooth. Scrape the mixture into the bowl of the mixer and chill 50-60 minutes. Stir the bowl 3 or 4 times, it will start to thicken as it chills. Do not allow the mixture to get too cold or it will thicken too much to whip. Well, of course this was try one- too thick to whip. So I warmed it again and chilled it again (much less time but I was making a smaller amount so that makes sense). Next using the whisk attachment whip the ganache on medium speed until it lightens...don't over beat or it will become grainy. Ok this was try #2, it was grainy. So again I warmed it and chilled it. This time I was very careful. I still don't think it was perfect. In any case I frosted the cake, chilled and served.
This genoise was definitly better than my last attempt. I do believe the beurre noisette AND using the proper amount of syrup made all the difference. The ganache just melted in your mouth.
And the coffee flavor wasn't over-powering. As you can see I made a smaller cake cutting everything in half. In spite of the size, amount of coffee flavor, failed attemps at making the whipped ganache, it was a very nice cake enjoyed by all.

Tuesday, November 16, 2010

Apple Upside-Down Cake

Whenever given a choice I use apples. Such a light, delicate, sweet, sometimes tart flavor. Never have I ever not liked something made sweet or savory with apples. And then there are so many varieties to choose from! I have my favorites for pie, others for tarts, and still more for apple sauce and savory applications. This week the Heavenly Cake Bakers left the choosing to the bakers and of course it was Apple Upside-Down Cake for me. Since I am already late to post, without further delay lets dive into this gem.
The project breaks down into 2-3 components. The first being the bottom or shall I say the topping. Rose's recipe calls for brown sugar, lemon juice, butter, apples of course and walnuts (although I had to delete the nuts for "J"). All of the ingredients are mixed together save the butter and some of the brown sugar to mingle together and release some delicious juices. The butter and brown sugar are cooked together to make some caramel. The apples are arranged on the bottom of the cake pan with caramel and juices poured over the top. Simple as 1-2-3. As you can see however, I didn't quite get enough of the juices. I will have to change out the Cortland apples for a juicier variety next time. So make a note of this. I was not totally happy with using brown sugar in place of white sugar here either. I felt that the molasses over shadowed the apple a little. Next time I would use white sugar so that the apples shine through.
The next step is the cake batter. I can tell you straight out that with the inclusion of sour cream this batter was very smooth and that it was delicate, buttery, and had a small crumb.
The third component as you can see I omitted. It was a Bourbon flavored whipped cream garnish. Have to watch the waistline sometimes!
Overall all my tasters enjoyed this cake as did I. It was easy to like and went well with coffee and a glass of milk. I know I will do this cake again with the small changes I mentioned. Hope you give it a try too and let me know if you change the fruit.

Monday, November 8, 2010

Swedish Pear & Almond Cream Cake Rerun

When I saw that this weeks project with the Heavenly Cake Bakers was the Swedish Pear & Almond Cream Cake that I did in error on May 31th I was glad. Since this is a wonderful multi-purpose cake as is I couldn't help but wonder how it would taste if I changed the fruit. Having this opportunity to bake it again I thought instead of pears I would try apples. This recipe is set up in the usual easy to follow multi component format that I love so much. So let us get going.
The first component to prepare is the almond cream. Almond cream is one of those mixtures that can and should be tried out different ways. I use it as a middle layer in apple, pear, and blueberry tarts or tartlets, as a spread on brioche (just spread and brown under a broiler), and now as a component of a "coffee" cake. It is simply a mixture of almond paste, sugar, butter, flour (or cornstarch), egg, and vanilla (of course). All ingredients go together quickly in a food processor and can be frozen (up to a month) for later use or stored in the refrigerator for 1 week.
The next component to prepare is the batter. This batter contains sour cream (ooooh the promise of a creamy smooth batter), cake flour (ahhh, delicate crumb), butter, sugar, vanilla, egg, and the leavenings. And lets not forget the pears (or shall I say apples in this run) sliced thinly and sprinkled with lemon juice.
The batter is spread in a greased and floured bundt pan. A 1/2" depression is made around the middle of the batter where the almond paste is spooned. Top the with the thinly sliced pears or apples and it is ready to bake.
There is two things I learned from this rerun. The first is that while some batches of cakes or cookies can be cut in half and baked in smaller pans, this is not one of them. Although the finished cake was still delicate, light, small crumb and wonderful in its vanilla-apple flavor, I was left with the desire for more. More cake that is- the piece was just too short! Therefore, I would not reccomend cutting the batch size but rather go for a SLIGHTLY smaller pan for a higher cake. The other thing I learned was- pears or apples this is a wonderful addition to anyones favorites list.
Hope you enjoyed!
P.S.- I would also consider some cinnamon if I was to do the apple again :)

Monday, November 1, 2010

The Bostini

The very moment I laid eyes on the Bostini I couldn't wait to make it. What can be better than an orange chiffon cake sitting in vanilla bean pastry cream sauce with chocolate glaze spilling ovr the top? I for one could think of nothing (at the moment that is). Well, this week the Heavenly Cake Bakers all set out to do this project. I can't wait to surf around to my fellow bakers blogs to see the various results. So, without further delay lets break this one down into 3 components; the cake, pastry cream, and glaze and get going.
The cake derives it wonderful orange flavor from fresh orange zest and fresh squeezed orange juice, The tender crumb is due to the cake flour I am sure. And the ethereal texture of this wonderful cake is certainly due to the meringue that is carefully blended into the batter. I was very pleased with the results of this cake from start to finish. No dryness with this cake.
The vanilla bean pastry cream sauce was the next component to be prepared. Made from milk, yolks and a single whole egg, vanilla bean (of course), sugar, salt and heavy cream. There is nothing not to like about this pastry cream. Simple to prepare, creamy texture, and unbelievable vanilla flavor.
My family are not big fans of chocolate and I didn't want to over power the light flavors of the cake and cream, so I went very light on the chocolate glaze. It was easy to prepare with butter and chocolate. Slowly melted into each other and poured over the top before cooling.
The sight of this beautifully presented dessert had the whole family antsy to try it out. We were all delighted with the Bostini. The only draw back is that it was gone as soon as the photo shoot was done!!!

Monday, October 25, 2010

Chocolate Angel Food Cake

This week with the Heavenly Cake Bakers it was a Angel Food Cake challenge. Challenge because even though the ingredients list is short and the directions seem easy, don't be fooled. The first few times I tried my hand at Angel Food I failed miserably. However, that was when my stubborn streak kicked in. I wasn't going to give in to something as light and feathery as an Angel Food Cake!
Soon after and many eggs later I realized the key to success with this type of cake is in the meringue. Yup, that would be the egg whites and sugar! And the key to success with meringue is in recognizing when the egg white is at the soft peak stage. Then and only then should the sugar be introduced in a slow and steady stream. After achieving success with your meringue the rest is a matter of following the authors directions. Rose Levy Beranbaum's version of Chocolate Angel Food Cake was easy to follow and.....well you'll see what we thought at the end, so read on.
Ingredients:
superfine sugar (superfine is very important)
cake flour or Wondra flour (I used cake flour)
salt
egg white
cream of tarter
vanilla extract
grated chocolate (I used a semi-sweet)
Directions:
Whisk half the sugar, flour and salt together; set aside. In the bowl of a stand mixer using the whisk attachment, the egg whites and cream of tarter is beaten until soft peaks are foamed.
The balance of the sugar is gradually added with the mixer running on a medium-high speed. Continue beating until stiff peaks form.
Carefully and slowly fold in the dry ingredients. Then fold in the grated chocolate, again careful not to deflate the batter.
Empty the batter into a tube pan and bake on 350 degrees for 25-40 minutes. The last step to success is to turn the cake pan upside down for 1 1/2 hours to cool completely.
There are many ways to finish off an Angel Food Cake. You can simply dust with powdered sugar, drizzle with chocolate, top with ice cream and on and on. My family wanted it simply "as is" for their first taste. We found this cake to be moist, tender, and simply delicious. Perhaps tonight it should sit next to a scoop of ice cream!

Monday, October 18, 2010

Many-Splendored Quick Bread

It was nice to bake a quick bread with the Heavenly Cake Bakers this week. Quick bread isn't something I would normally choose to bake but, the addition of carrot & zucchini made this one a little more interesting. The recipe presented in Rose's Heavenly Cakes book looked easy to do so I'll just get on with it.
The ingredients list was a little longer than usual but very nothing odd or hard to get. It included walnuts (for a gentle crunch), oatmeal (fiber-so maybe this is healthy?), banana (moist), oil (which means it will stay soft even straight out of the refrigerator), brown sugar (mmmm, warm flavor), sugar, egg, zucchini, carrot (nice colors), flour, and the usual leavenings. The instructions called for toasting the walnuts which gaves this quick bread much needed flavor.
After making the batter and baking I brushed the top with honey and sprinkled with a sugar-cinnamon mixture. Then allowing the bread to cool I sliced it up and popped a piece right into my mouth. I found the cake to be tender, moist, and colorful. However, I wish I had tasted the batter before baking I would have added some spices. I felt that there just wasn't enough flavor. But, then again if you were in the mood for something simple and not too sweet, this would be nice with tea or coffee.

Monday, September 13, 2010

Free Choice- Lemon Meringue Cake

This week with the Heavenly Cake Bakers it was a free choice. Free choice to me meant something I missed doing which this time meant Lemon Meringue Cake, which was really Lime Meringue Cake, phew! Before I get into talking about this wonderful cake I want to thank Marie at the Heavenly Cake Place for making me, yes me, the featured baker last week. It was an honor, thank you. I must admit that most of what I have baked from Rose's Heavenly Cakes has been very tasty, with easy to follow instructions and I am happy to be a part of this group.
Now, on to this weeks challenge of Lime Meringue Cake. There were three components to this light and airy cake. First the cake of course, a genoise cake with Wondra Flour again (note to self- must get some and try it out). Not my favorite type of cake since it is usually a bit dry. However, there are those times when the cake needs to be a bit drier to support a very moist filling or topping, as in this case. The cake was soft and billowy and easy to put together. Next up is a quick and easy lime simple syrup which btw takes care of most of the dryness in the cake.
The next component is a lemon curd (again lime in my case). Made with silky, golden egg yolks, lime juice, zest, sugar and salt....easy. No suprises here with successful results. However, I did take some liberty here and lighten the finished curd with some whipped cream. This made for a creamy, lighter filling not too over-powering. In one word- lovely.
The final component was a meringue, not just any meringue nope, an Italian Meringue. Italian Meringue is made with a boiling (248-250 degree) sugar syrup poured slowly over the whipped egg whites. This mixture also contained some lime juice, sugar, and cream of tarter. Making meringue can sometimes be a little tricky along with the danger of burning yourself should any of the syrup splatter on you. To avoid this either turn the mixer off when adding the syrup to the egg whites or pour it very carefully down the side of the bowl being mindful not to hit the whip attachment. Whichever you chose take your time with this step or the eggs will deflate and you will not have the cloud-like meringue you so deserve.
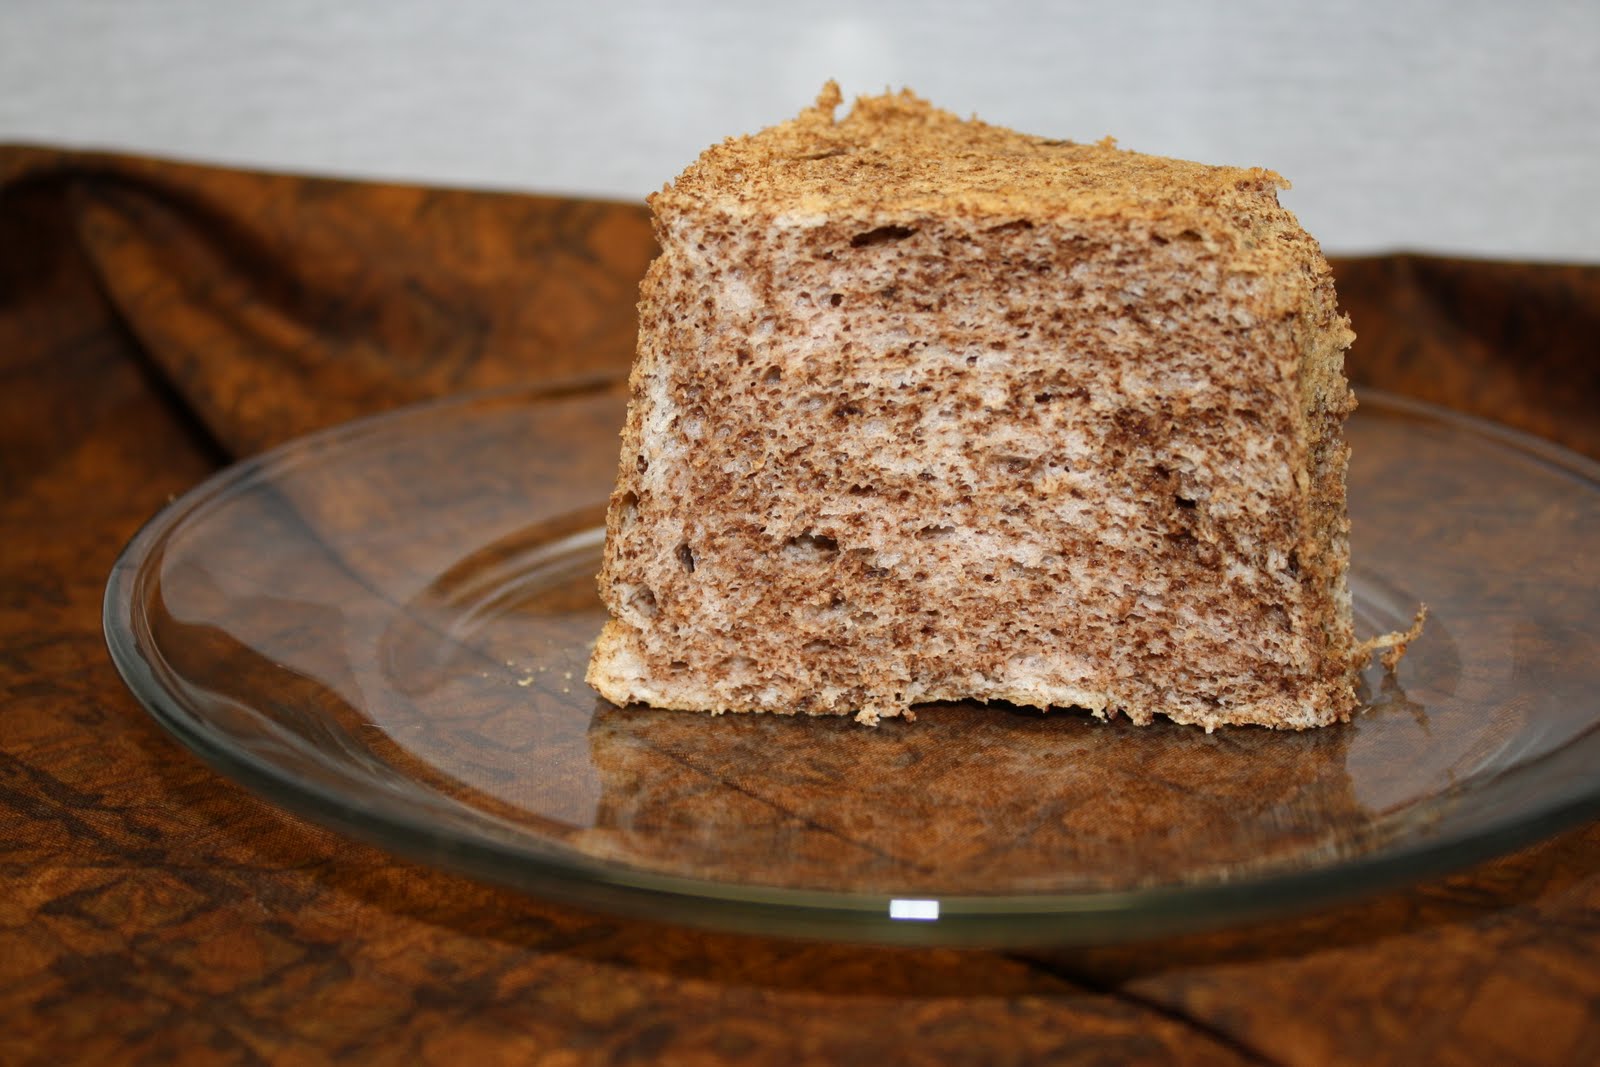
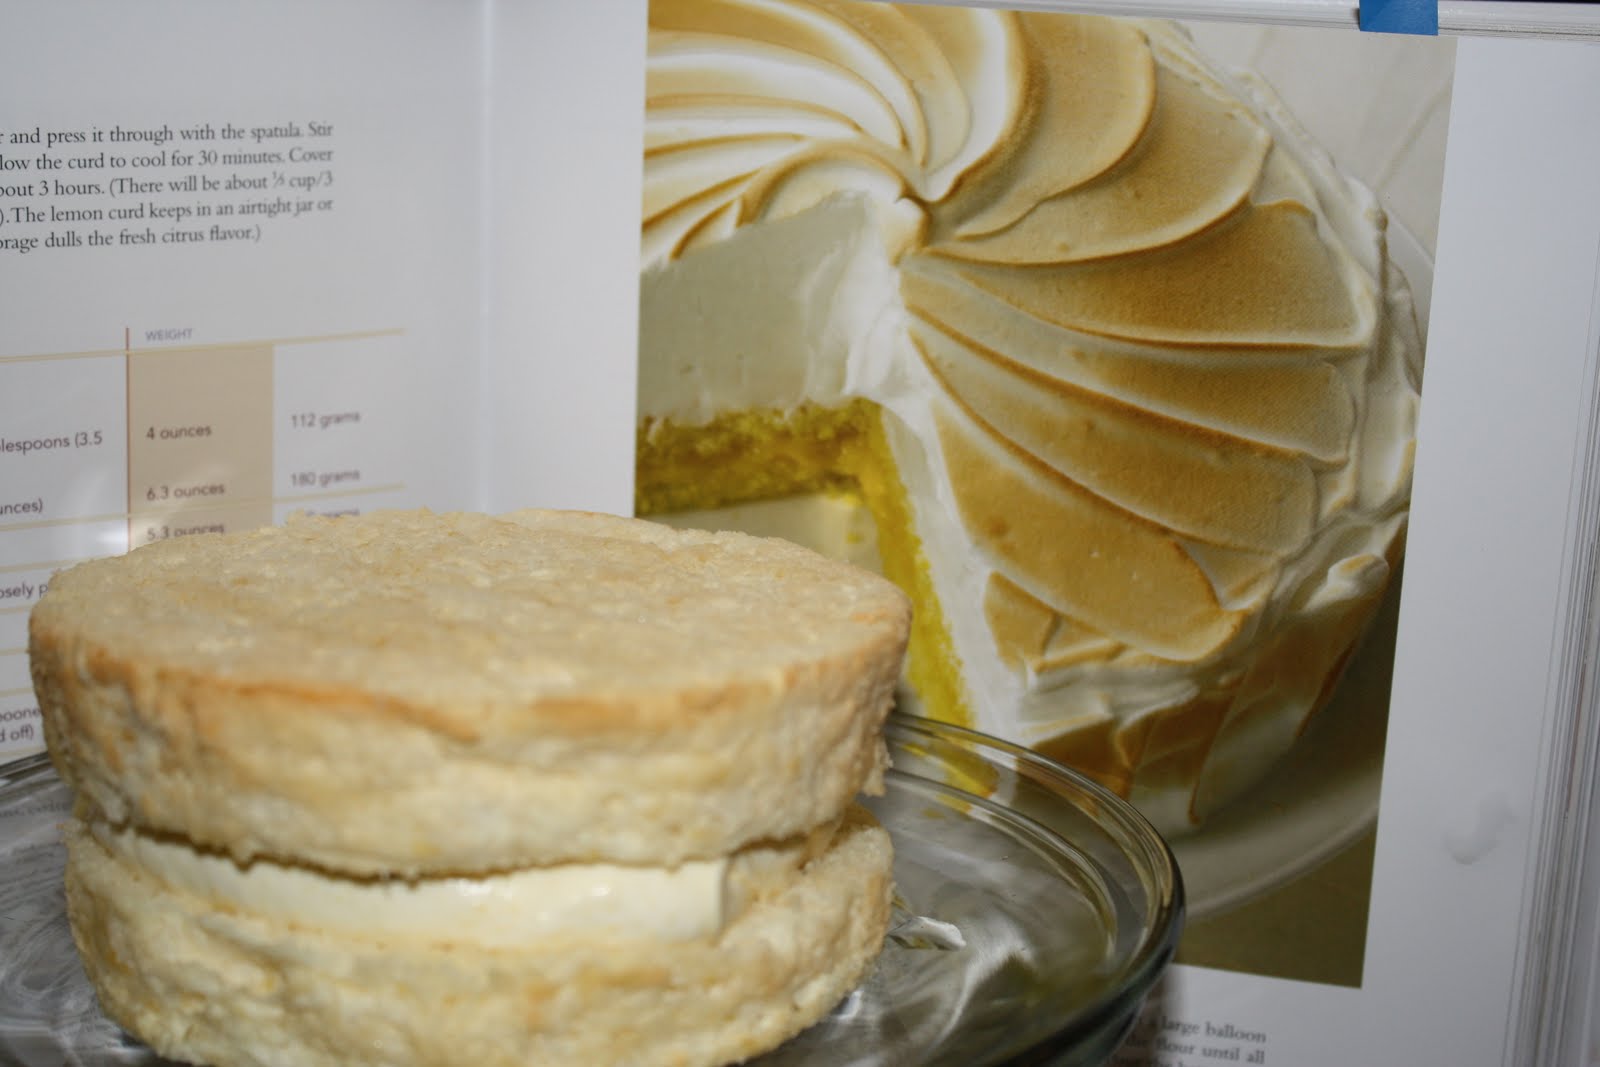
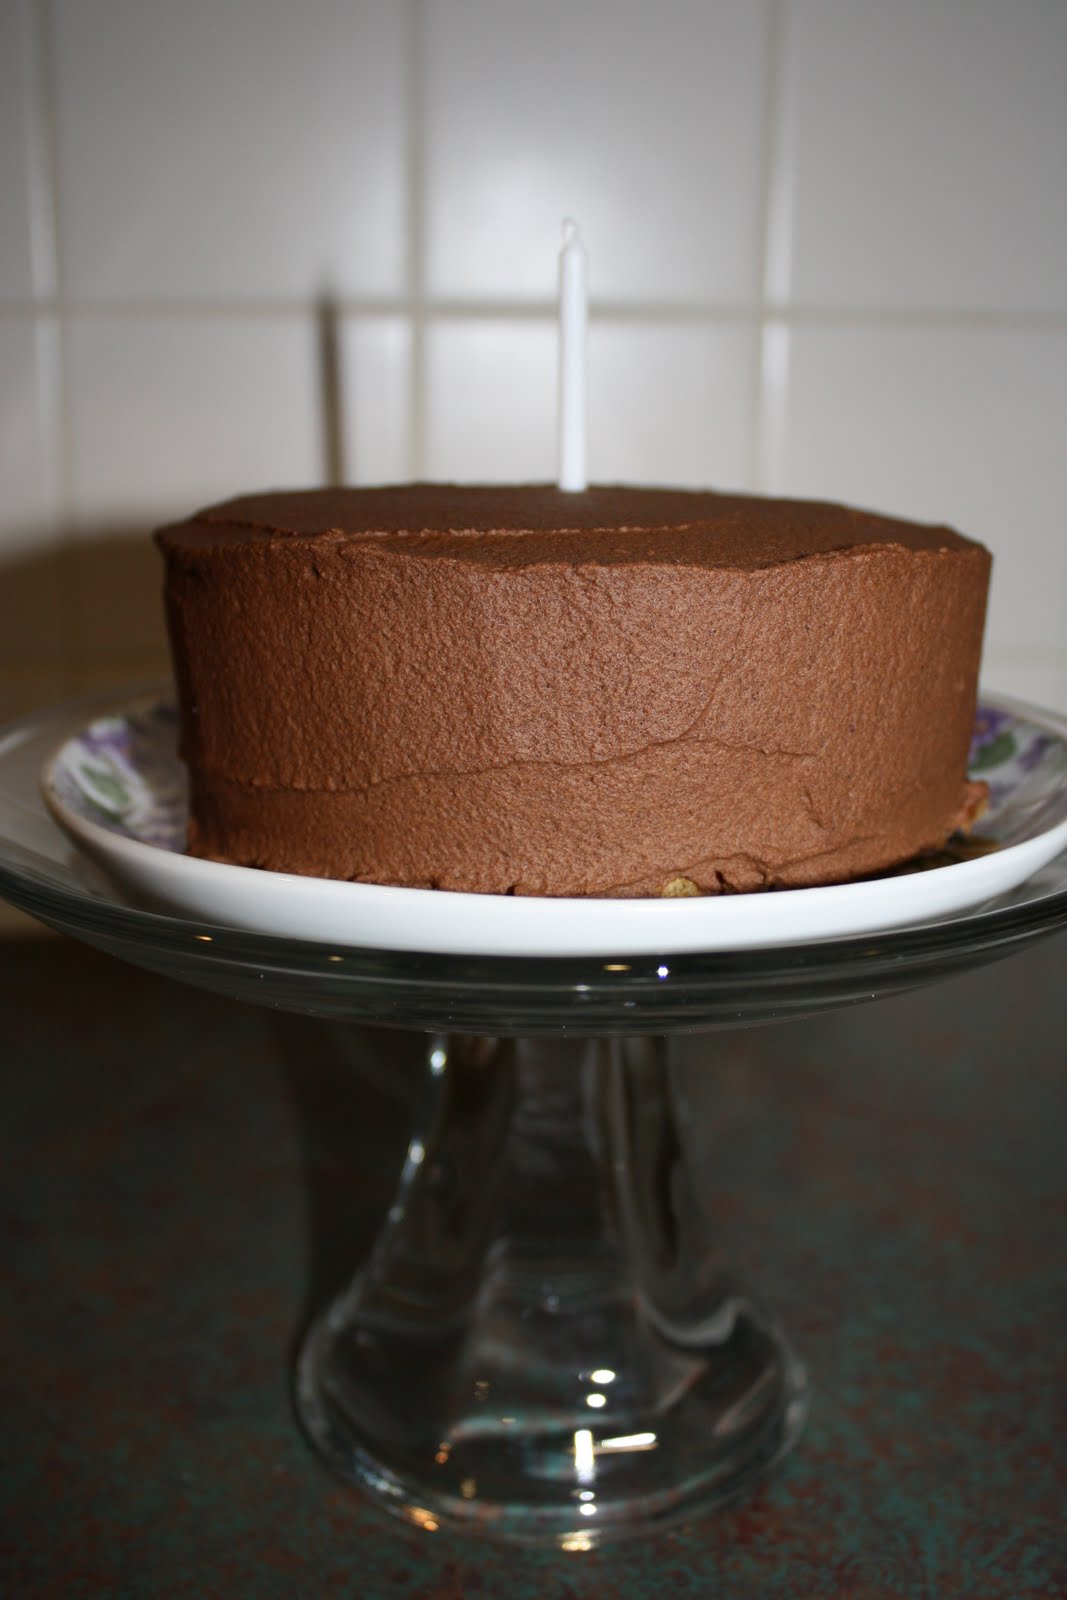
Time to assemble and finish this lovely cake. As you can see I cut this recipe in half (which is standard for me)yielding a small cake and a mini-me cake, just enough. I sliced both cakes into 2 layers, brushed the lime syrup on each layer. Then filled the layers with the lightened curd and covered the cakes with the Italian Meringue. Now the part where I feel like the mad scientist.....using my handy torch I slowly, artfully toasted the meringue allowing some of the texture to show up.
Alas, overall I think this is a tasty cake. I like the smooth filling, the flowery flavor of lime, and the light meringue topping. I still feel the the cake is dry. Maybe I am not soaking the layers with enough of the syrup. Anyway, I am hoping a day of rest in the refrigerator will allow all the flavors and moisture to merge more evenly. Am I the only one who thinks genoise cake is too dry? If so what could I use instead?

Monday, September 6, 2010

Golden Round Ingots

If you visit me often you already know that I make Financiers often so when I saw that this week the Heaven;y Cake Bakers were to make Gold Ingots I paused only for a moment and thought. This meant I would have to deviate from my recipe of choice and try something new. Not such a bad concept so I went for it. However, being the over achiever that I am, not only did I make the Golden Ingots (in the round) but I proceeded to make the Chocolate and Peanut Butter Ingots as well. This proved to be very interesting for me on a few levels. First off the most obvious is that I don't have a loaf shapped silicone pan. Silicone is not my favorite vessel for baking but, I had purchased one many moons ago to experiment with.
The three financiers recipes and my own all call for the same basic ingredients; almond flour, butter, superfine sugar, flour, baking powder, egg whites, and flavoring (vanilla, almond, cocoa, or peanut butter).
The techniques for the three varieties from Rose's Heavenly Cakes along with my recipe of choice were almost the same. Almost I say for two reasons. The first reason is that Rose's directions call for beurre noisette which is what intrigued me from the start. There isn't a recipe that I have tried that does not benefit from browning the butter. This was no exception. The second difference was in making the batter. Specifically in the treatment of the egg whites. In the Gold and the Chocolate Ingots the egg whites are added to the dry ingredients and mixed with a flat beater just to incorporate. In the Peanut Butter Ingots and my recipe of choice, the egg white are beaten first with the whisk attachment. After which the dry ingredients are added and then the butter is added slowly giving the mixture a chance to emulsify. I prefer this procedure and find that it makes for a fluffier batter and a lighter financier.
In the end I found the Golden Ingots to be a little dryer, rougher in texture and not as flavorful as I had expected even though I added extra vanilla. The Peanut Butter and Chocolate Ingots were much more flavorful and moist.
Clearly I will rotate my recipe of choice to include Rose's Chocolate and Peanut Butter versions. Let me know what you think or feel free to share your recipe. Mine can be found in an earlier post if you you want to try it.

Monday, August 23, 2010

Marionberry Shortcake

This weekend the very welcomed baking project with the Heavenly Cake Bakers was a Marionberry Shortcake. Fresh fruit on light cake topped with sweetened whipped cream, what's not to like about that! The first challenge in my prep stage turned out to be locating Marionberries. I can tell you with certainity that there isn't a grocer within 40 miles of my home that carries marionberries. No worries though.... I picked up some beautiful raspberries instead.
This recipe easily seperated into three components; cake, filling, and topping. The first component is the shortcake. I must say I expected this to be dry with the small amount of butter and "Wondra" flour. I am happy to say this was not the case. So onward...
The ingredients for this version of genoise is the ever tasty beurre noisette (browned butter for any of you new comers), eggs, sugar, vanilla and Wondra flour. Since I do not use this flour I followed Rose's suggestion and substituted a mixture of cake flour and corn starch. The directions were easy to follow and yielded a nice amount of light and fluffy batter. Here I used a large muffin pan to bake off the 6 individual sized cakes taking only about 20 minutes in the oven. After the cakes cooled completely I trimmed the bottom and top (that stickly layer that forms after cooling). Then proceeded to cut a 1/4" deep cavity for the fruit to rest.
Ah, now the fruit! I really would have liked to find Marionberries since I have never tasted them. But, as mentioned above, no such luck. Anyway, I took the raspberries and added some sugar, covered and let them rest in the refrigerator. This didn't yield as much juice as I would have liked. But once again Rose rescued me with her suggestion to add some Chambord to the muxture. Now this was a nice addition I didn't mind at all!
The last step was to whip up some sweetened whipped cream for the topping (I gave it a little pink tint to match the berry syrup). Now on to assemble then taste of course! Taking one cake at a time the top and bottom was gently brushed with some of the syrup. Next spoon some berries into the pre-cut cavity and top off with whipped cream.
I was very pleased with the results of this project. The cake was light and very tasty (thanks to the browned butter), and the timing for the raspberries was perfect. Overall the finished dessert was very pleasing and satisfying- a success.

Monday, August 9, 2010

Apricot Upside-Down Torte & an INCREDIBLE Weekend

Crazy busy can translate to stress or it can translate to an incredible fun time. This past week and weekend was most exciting and very incredible. The Heavenly Cake Baker chose Rose's Plum & Blueberry Upside-Down Torte for this week. I decided to take Rose's suggestion and substitute the plums and blueberries for some golden, deliciously sweet apricots which are is season in here now. I knew it would be impossible to bake over the weekend so I completed the project during the week instead. After all I had already missed a couple of weeks and didn't want to miss another so lets get goin'.
As with most of the recipes in Rose Levy Beranbaum's book there are three components to this cake. The first up is to prepare a caramel sauce using sugar and water. This is quick and easy as long as you remain attentive. The sauce is poured into the carefully prepared pan.
Next the sweet, floral apricots are nestled cut-side down into the sauce. The third and final component is the cake batter.
Ingredients:
flour sugar (super fine, please)
baking powder
salt
butter (room temp, of course)
eggs
vanilla
The instructions suggest using a food processor to blend the ingredients. Since I don't usually do this I figured it was worth a try. The batter came together quickly and was silky smooth. After baking, the cake needs to cool slightly before inverting on a dish. Unfortunatly I left it to cool a bit longer than suggested and was dreading the results. But....fear not! Having used my smaller cake pan with it's removable bottom, the cake released without a hitch! In my humble opinion this cake is one of the easiest yet, one of the most flavorful. "J" and I both enjoyed the sweetness of the apricots in its caramel sauce together with the moist vanilla flavoring of the cake. I hope you give it a try.
Now just for peak I'll explain briefly the reason for the "incredible part of this weekend.
I was truly lucky enough to be able to participate in a cake sculpture workshop with none other than the most talented Colette Peters. If you do not know who this incredible lady is and have even the slightest interest in cake sculpting and decorating then please take a look at her website. I hope to have an entry dedicated to this weekend soon. In the meantime here is just one picture>

Monday, July 19, 2010

Chocolate Banana Stud Cake

The banana with it's more than 500 varieties is one of nature's more perfect foods. It contains 3 natural sugars, several different vitamins, minerals, and fiber. It is not only healthy but helps to overcome and prevent many illnesses and conditions. They can be eaten straight off the plant, baked into desserts, fried, broiled, steamed or sauteed. Bananas can be pureed and used to replace eggs in a dessert to reduce the fat content or aid in the conversion of a recipe to vegetarian. This week however, my mind was not on the healthful aspect of the banana but on it's sweet, heavenly flavor. Keep in mind when matched with chocolate its flavor can be over powered and may also result in a rubbery texture. This week the Heavenly Cake Bakers project was Chocolate Banana Stud Cake. Sounds sexy and complicated, right? Well, not this time! So, let's talk cake: The list of ingredients doesn't skimp on the good stuff, like butter, eggs, cake flour (ah, the promise of a soft crumb), cocoa (yes, again not an overpowering of chocolate- the banana will shine), sour cream (makes for a smooth consistency), vanilla extract and leavenings. Just a reminder: I hope that in not listing the measurements and recipe details that you are sufficently teased and are more likely to purchase your own copy of this lovely book (enough sales!!!). One of the details that seems to be repeated in many of Rose's chocolate cakes is the use of cocoa instead of squares or slabs. The baker is instructed to moisten the cocoa powder with boiling water and stir until smooth, then cover to cool. This technique I like very much and is probably one of the things I like best about this book. The remainder of the steps are very easy with no suprises. For this cake as with much of my baking I chose to make a half batch and use a smaller cake pan. It baked up nicely and unmolded without a hitch (thanks to the use of my beloved parchment paper). The cakes is finished off with a chocolate ganache which I applied thinly. As you will remember we are not big chocolate lovers. The "stud" look came from applying chocolate chips upside down around the top of the cake. I used both semi-sweet and milk chocolate chips. The slight haze over the top of my chips is from storing them in the refrigerator. If kept too cold some of the cocoa butter will rise to the surface of the chocolate. This does not alter the taste. If this cake was to be given away I would have used a new bag to avoid that haze.

The banana shares the spot light with chocolate amicably. The cake presents itself well and the taste is phenomenal. The fine texture and crumb earns it's place on my "favorites" list.

Monday, July 12, 2010

Mini Vanilla Bean Pound Cakes

This week's project with the Heavenly Cake Baker was Mini Vanilla Bean Pound Cakes. Pound cake is one of my favorite cakes and coupled with the star ingredient vanilla bean, I was looking forward to this from the time I spotted it on the schedule of projects. The cake in this version is soaked with a vanilla Cognac syrup too, yum! Pound cake is a British creation dating back to the 1700's. The original recipe used one pound each of eggs, butter, sugar, and flour. No leaveners were used except for the air whipped into the batter. Over the years the ratio of these ingredients has changed and leaveners are used to lighten it up a bit. The pound cake is very versatile and has many variations and versions. Rose Levy Bernanbaum, author of the lovely, "Rose's Heavenly Cakes" gives the baker a short ingredient list, nothing complex for technique and flavor that raises the bar on this version to excellent. So lets talk. The star ingredient here is the vanilla bean, two to be exact. Then there is sugar, eggs, milk, cake flour (yes, a fine crumb), leavening, salt, butter (of course) and vanilla extract. The vanilla beans are to be split and scrapped into the sugar and rubbed to distribute evenly (.a.k.a: vanilla sugar which on its own can be used in many applications). The liquid ingredients are mixed together as are the dry ingredients. Then the butter is added to the half the liquid mixture followed by the dry ingredients and the balance of the liquid. See? Simple......remember the vanilla and the delicate cumb is what makes these little cakes so special. As the cakes cool a vanilla Cognac syrup is prepared. I used Vanilla Schnapps in place of the Cognac along with sugar and water. After bringing the mixture to a boil remove it from the heat. Cover and cool. Once the cakes are cooled the syrup is brushed over the cakes. This cake rates high on my list. It was a breeze to prepare, the fine crumb and moist cake was delicious. The syrup inhanced the beautiful vanilla flavor. This is truly a keeper as "J" would say.

Monday, June 28, 2010

Genoise Rose with Triple Sec Syrup

This week with the Heaenly Cake Bakers group the selected project was the Genoise Rose soaked with a Triple Sec syrup. But first a little about the genoise cake. Genoise is a french term for a sponge cake that was originally taken from Italy. Its distinguishing technique is that the eggs and sugar are heated together over hot water before being whisked. The genoise is usually used for special occassion cakes, wedding cakes, jelly rolls and petits fours. The crumb is strong and capable of holding liquid without getting soggy. The cake is typically soaked in flavored syrups to add moisture and another layer of flavor. Some versions have no butter while others can have 2-8oz of butter. The key to success is in the folding of the dry ingredients into the whipped eggs. Since the eggs are whipped to add tons of air it is important to keep it there. Therefore a light hand in folding is a must, so read the directions in your version very carefully.
This week it was Rose Levy Beranbaum's version, the Geniose Rose baked in a metal rose tube pan. I however do not have a rose pan but I do have a mini bundt pan just waiting for its chance to shine. The last time I used this pan was a disaster. I was being very stubborn (if you know me you will agree I can often be very stubborn), I just did not want to use a "baking spray". There was something chemical about it that I was not willing to expose my family or friends to. I buttered the pan diligently then floured it. Alas it was not enough and sadly my little cakes would not come loose from the pan. This time I wanted not only the little darlin's to come loose but I wanted them to remain completely in tack, no divots. Where am I going with this you ask? All this was just to make a point, that being- use a baking spray with flour as the recipe suggests when preparing the pan of your choice for this project.
Back on track now. The list of ingredients is pretty short with two very interesting changes from the verison I usually prepare. Rose calls for beurre noisette (or clarified butter) this adds a delicious nutty taste to the cake. Vanilla, eggs, sugar, cake flour and cornstarch also different from my norm. The cornstarch and cake flour will help give the cake a nice rise.
After preparing your pan of choice set it aside. Next is preparing the neurre noisette (aka: brown butter). To do this heat the butter (a little more than called for) in a heavy saucepan until the milk solids are golden. Then strain out the solids through a fine-mesh strainer into a heatproof cup.Stir in the vanilla, cover and keep warm.
As I mentioned earlier the eggs and the sugar are warmed over a pan of simmering water just until lukewarm to the touch, stirring constantly. They are then whipped on high for at least 5 minutes. The eggs will be light yellow, thick, airy and quadruple in volume. While you whip the butter, sift the flour and cornstarch; set it aside.
Now on to the mixing and folding. Take about one cup of the egg mixture and whisk it into the butter mixture. Sift half of the flour-cornstarch over the top of the egg mixture. With a large balloon whisk fold gently yet rapidly until the flour has been absorbed. Repeat with the remaining flour. Fold in the butter mixture just until incorporated. Pour the batter immediately into the prepared pan. Bake 20-30 minutes on 350 degrees. The genoise cake should be unmolded as soon as it has been baked, onto a wire rack that has been coated with baking spray to avoid collapse. Yay! Success! The little cakes fell out of the pan with ease! Ok, so maybe I'll keep a can around to use with this pan. Let cool completely.
In the meantime preparing the syrup is a snap. Sugar and water are combined to make a simple syrup to which Triple Sec is added when cooled. I can easily see that any number of liquours can be used for flavoring. The cake is soaked with this syrup after it has cooled completely.
I found this cake to come together easily, have a beautiful fine crumb and hold the syrup well- as stated in Rose's introduction to this cake. On the same note, I found it to be extremely dry and I needed additional syrup to make it edible on its own. That being said I would not hesitate to use it again in a Tiramisu Cake or any other cake that was to be soaked with a syrup.
I look forward to next week's ice cream cake!

Monday, June 7, 2010

Chocolate Butter Cupcakes

This week the Heavenly Cake Bakers baking project was Chocolate Cupcakes. I love individual sized portions and I love cupcakes so I was happy to partake. Rose describes these as velvetly, moist and deeply chocolatly. The only thing she left out was: quick and easy. With the heat and humidity this past week the quick and easy part was whole-heartedly appreciated.
I usually mise en place the dry ingredients a day or two before I plan on baking, then seal it in an airtight container or zip lock bag. The butter and eggs come out the morning of, to achieve room temperature. Then the wet ingredients are combined just before I start.
The chocolate butter cupcake batter is made with cocoa combined with boiling water. I was very happy to use cocoa again since I find it not as chocolately as the chunks of semisweet or bittersweet chocolate are . Not to mention I am totally out of quality chocolate and shy away from purchasing a fresh supply during the summer months.
Ok, back to the matter or batter at hand. The liquid ingredients; eggs, water and vanilla ar combined and set aside. The dry ingredients which were cake flour, superfine sugar, baking powder, baking soda, and salt are mixed in the bowl of the mixer. The butter and the chocolate mixture is added and mixed on low speed until the dry ingredients are moistened. After scrapping down the sides the wet ingredients are added in two parts, mixing only until blended (about 30 seconds).
At this point I decided to make small or mini cupcakes. It is easier on the waistline and much easier to share. To finish these little cakes off I used a butter cream frosting and gave it a little green tint to match the liners. Cute, huh?!
These little cakes were just delicious, the fine choclate crumb were tasty and moist, as promised. The buttercream melts in your mouth making every bite of these little cakes simply "heavenly"!
What is your favorite topping?

Monday, May 31, 2010

Swedish Pear & Almond Cream Cake

This week the Heavenly Cake Bakers assignment was "free choice"! Yes! This worked out very well since we were traveling and the weather was hot and sticky. I knew I wanted something simple, tasty and different. The Swedish Pear and Almond Cream Cake fit the bill perfectly. Pears; light, sweet, delicate. Almond paste; whats not to love there and a sour cream base cake; yum.
So misen place the three components- the Almond Cream filling, the cake batter and the pears.
First the Almond cream which can be made in advance and kept in the refrigerator. Putting it together was a snap in a food processor by just combining the almond paste, butter, sugar, egg, vanilla, and a little flour.
In this recipe cake flour or all-purpose flour can be used. I chose cake flour. There is also sour cream along with the usual eggs, sugar, vanilla with baking powder and baking soda for leavening. I love a cake with sour cream, I find it to be richer and smoother especially when paired with cake flour.
The pears are simply thin sliced and drizzled with lemon.
For the assembly begin with a well coated and floured bundt pan. The cake batter is spread evenly all around and smoothed with a small metal spatula. Using the spatula again make a shallow depression in a circle around the pan. Spoon the almond cream into the depression. This helps to keep the cream from touching the sides of the pan. Next and last layer is the pears; in two overlapping rows around the top. Simple... right?! Exactly what I needed for this holiday weekend too.
Although the Swedish Pear and Almond Cream Cake is simple to make it is not an ordinary cake. The taste is incredible, the cumb is fine, and the almond flavor is just enough not to over power the sweet delicate taste of the pears.
I had no problem with this cake, it traveled well and everyone enjoyed it. Boy, am I glad I got the final picture when I did because it was gone in two days!
Traveling with baked goods is always a challenge. I find that I either make something that can take the heat or travel with a cooler filled with the components. What are you favorite traveling sweets?

Monday, May 24, 2010

Bernachon Palet D'Or Gateau

Heavenly Cake Bakers, a group of incredible bakers using Rose's Heavenly Cakes by Rose Levy Beranbaum for weekly inspiration. Yes, I joined just waiting for official confirmation that I'm in. But, that won't stop me from this week's challenge- nope. My only hope is that I can create cakes half as good as those I have seen so far.
This week's challenge is a mouthful in many ways. The Bernachon Palet D'Or Gateau is a wonderfully beautiful, (cover photo for the cookbook) cake. I was ready for a challenge and this did not disappoint.
The first step is to put together and bake the chocolate cake base. The sour cream addition to the cake batter gave it a smooth texture and fine crumb.The cake uses only cocoa powder here for its rich chocolate taste.The ganache layer however is something else indeed.
For this layer Rose's recipe calls for a chocolate ganache with the addition of sour cream for a little tang. I however decided, since I was craving peanut butter for two days that I better make a ganache with some tasty, creamy peanut butter. I used the chocolate peanut butter ganache recipe on page 186 to satisfy my craving. Since the chocolate takes center stage in either version of ganache it is important to use a good chocolate. I have in my arsenal a semi-sweet Callebaut for just such an occassion.
The final step is a thin illustrious Chocolate Laquer Glaze. Again this uses cocoa powder, not that that is a bad thing just different than the galzes I've used in the past. But the result is an incredible shine and beautiful presentation.
The only problem I ran into is that the glaze remained quite wet even after 12hrs. The only reason I can think of is that is is very humid here and may have contributed to the wetness. My testers all agree that this cake is very good and encourage me to keep on baking!!! I am very happy with Rose's book and the resulting cakes that I have made thus far.