Neapolitan Bars, sounds interesting, right? Sounds like it has some layers of flavor like Neapolitan ice cream, right? Yes and yes, it is and does. I was so honored when Hanaa of the ABC Bakers asked if I would like to choose one of the next baking projects. There was no delay in my choice. I had just made these bars and was very excited to share. This special treat and newest baking project can be found in Flo Braker's book, "Baking for All Occassions".
One of the things that I like about Flo Brakers' books (I currently own 2) is that she has a wide assortment of recipes. Some cookbook authors are heavily into chocolate or some other ingredient. It becomes difficult to bake from such a book if you are not in love with that ingredient. But as I said, Flo is different and I never tire of perusing her books for a new baking project. And this recipe will not disappoint. Enough of all that lets get to the bar!
This bar actually has 4 layers of flavor. The first layer is a pastry like cookie layer rich in butter and delicate vanilla flavor. It is quick to assemble and and is baked to a slightly golden color.
The next layer is raspberry jam. This could probably be switched out for apricot, blackberry, strawberry or any flavor you desire. It is spread thinly on top of the cooled pastry.
Next the filling is prepared. It consists of almond paste (yum, right!), sugar, butter, eggs, and vanille. You can tint this green or not. The filling is spread over the raspberry layer. Bake this for 35-40 minutes until the top is just firm, not hard. Cool completely on a rack.
The last layer is a chocolate glaze. Butter, chocolate, whole milk, sugar, salt, and vanilla is melted together into a creamy, smooth, and rich glaze. Spread over the top of the filling using an offset spatula. Allow the bars to cool completely before cutting into small squares for serving.
These bars are extremely delicious. And are an impressive addition to any table for any occassion. Enjoy!
Showing posts with label ABC Bakers. Show all posts
Tuesday, August 16, 2011
Tuesday, March 1, 2011
Old World Braided Coffee Cake
Wow, a record....three posts over three days! Love it! The March project with the Avid Baker's or "ABC" was Old World Braided Coffee Cake from Flo Braker, Baking For All Occassions. This coffee cake is a traditional enriched yeast cake with a delicious walnut filling. It may look difficult and is definitely impressive. It can be enjoyed any time of day or for any occassion. Lets take a look.
I started with the filling a day early. The recipe calls for ground walnuts (but I am sure almonds, pecans, or macadamia nuts can be used with equal success), sugar, brown sugar, cinnamon, salt, heavy cream, maple syrup, vanilla, and egg whites. Quite a list but don't let that scare you away.
Aside from the egg whites the ingredients come together very easily in a food processor. The egg whites are added to the mixture after they are whipped. I put the mixture in the refrigerator overnight.
I don't dabble heavily into yeast based recipes because my success rate is usually 50-50. I know, I know success comes with experience. Ok, I really just want a little better odds! Anyway the chicken that I am would have ran the other way at the sight of the "y" word. Lately however, I embrase them still keeping my fingers and toes crossed though.
The sweet yeast dough ingredients are flour, sugar, yeast, salt, milk, butter, vanilla, and eggs. The instructions are a little different in that the yeast is added to the dry ingredients without proofing first. However, to my suprise and relief it worked. 
The most impressive part of this project is forming the coffee cake. When the dough is ready it is rolled into a 16x12 rectangle, divided into three vertical strips by gently poking it with a fork. The filling is spread down the middle section. More strips are cut horizontally into the side flaps. Then one by one alternating sides the strips are folded over the filling. The results are a very impressive braid.
The cake comes out of the oven a beautiful golden color with a delicious aroma. A simple sugar glaze is spread over the top for that added shine. This cake is very good and I surely won't hesitate to make it again. Great choice Hanaa!
Tuesday, February 1, 2011
Caramel Chocolate Cream Pie & the Avid Baker's Challenge
The "Avid Baker's Challenge?! Yes, this month I joined this fine group of bakers and will continue to bake along with them, positing on the first Tuesday of each month. We are baking from Flo Braker's "Baking for All Occasions". It is not my first experience with Flo Braker. I have been baking from her book, "Sweet Miniatures" for at least 8 years. It contains many of my favorites, so I expect "Baking for All Occasions" to be wonderful as well. S
ounds like it will be great fun and my first project with them was just that.
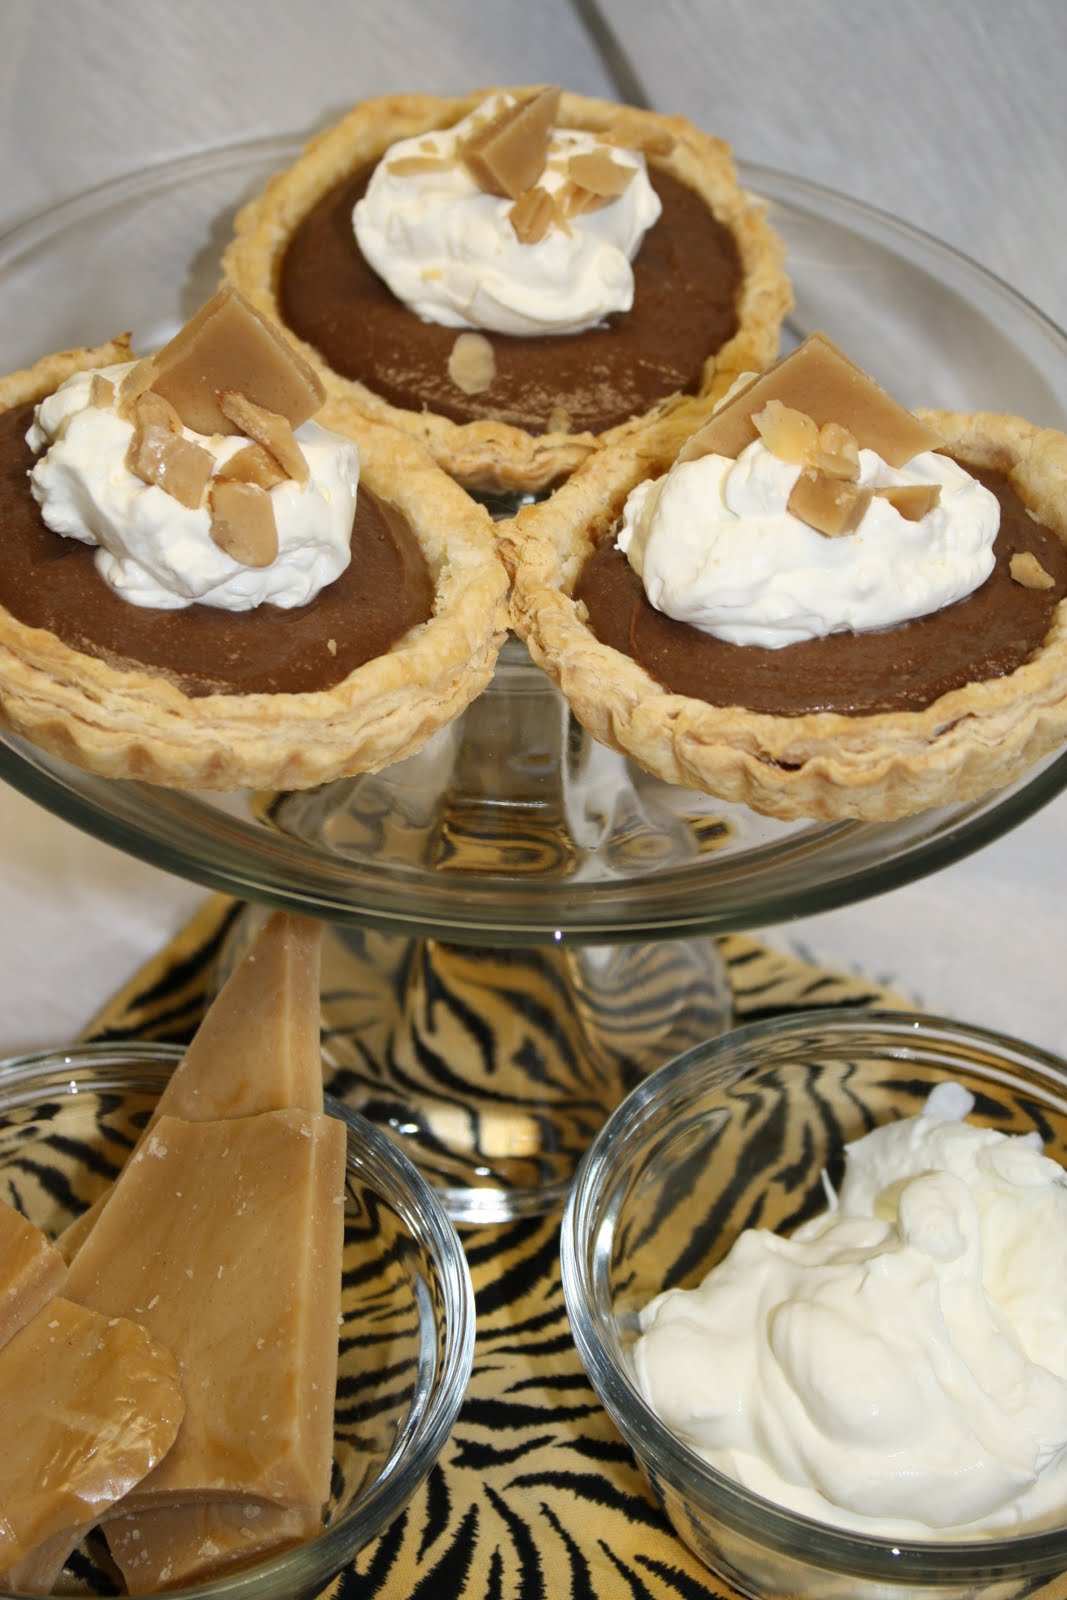
I am not a chocolate fanatic, definitely not a big fan of pudding (the box type), or pies really. But, I am a fan of an occasional piece high quality chocolate and anything creamy and smooth and a buttery, flakey home-made crust! This project contained all of that so I did not hesitate to accept this challenge. The Caramel Chocolate Cream Pie has 5 components: a buttery flakey crust, a layer of smooth, amber caramel, topped with a deliciously creamy chocolate pudding, garnished with sweetened whipped cream and toffee pieces (definitely not your mother's pudding pie!). Mouth watering yet? As you know I don't share recipes from my challenges. I am hoping to entice you enough to purchase the book for yourself. You won't be disappointed. So let me share this experience as best I can with you now.
The first component to prepare was a flakey, buttery crust. Now I am sure you have your favorite just as I do. Since Flo's recipe contained vegetable shortening ( I have an allergy to soy) I had to resort to my favorite this time (sorry Flo). But the balance of the ingredients remained the same. Flour, sugar (just a bit), salt, butter, and ice water. I let the crust chill overnight to insure optimal flakiness. Then I rolled out the dough cut circles and fit them into 4" tartlet pans. If you know me then you know I like individual size desserts (neater and more impressive when giving some away). The instructions required the shell to be fully cooked, or blind baked.
The next component is a caramel layer. For this the ingredients are: milk, butter, and heavy cream. Like most of the projects we bake technique is important and often it is as simple as keeping watch
over a pot. I don't find that caramel is difficult unless I am not keeping a close vigil. There is a very fine line between just right and burnt when it comes to caramel. When the caramel has cooled for about 45 minutes pour a layer into the cooked shells, and let cool completely.
The real star of this show is the chocolate pudding. I used a Callebaut semi-sweet here along with the milk, egg yolk, sugar, corn starch, salt, butter, and vanilla. I think the most important step here is to pour the pudding through a fine sieve to insure a very smooth pudding. Covering the surface of the pudding with plastic wrap will prevent a skin from forming (believe me you do not want that on top of this little gem). It now needs to chill for 3-4 hours.
The next 2 components are the garnishes. I have the most wonderful toffee recipe so instead of purchasing toffee bits I made some. Here is my favorite, simple recipe for toffee:
1 stick of unsalted butter
1 cup sugar
1/2 tsp vanilla
1/4 tsp salt
1 cup almonds (or other nut), optional
Foil line a 12"x7" baking sheet. Arrange almonds evenly (or not) on the bottom. In a heavy saucepan combine butter, sugar, vanilla, & salt. Cook over
medium high heat stirring constantly with a clean, dry wooden spoon until butter is melted. Continue cooking about 5 minutes or until candy is the color of unblanched almonds. Immediately and quickly pour candy, without scrapping the pot, over the prepared pan &/or nuts. Cool completely. Remove from foil, break into pieces and set aside.
Now back to Flo's recipe. The next and final component is a sweetened whipped cream. I know you can do this! Use heavy cream, powdered or granulated sugar, vanilla and some cognac or other brandy. Yum! When you are ready to serve top the pie or tartlets, as in my case with some whipped cream and sprinkle with some of the toffee bits.
Phew! Sounds like alot of work but, it really isn't if you do one component at a time and build the dessert up as you go. The end result is a very tasty, grown up dessert. Thank you Haana I had fun with this one!
Subscribe to:
Posts (Atom)